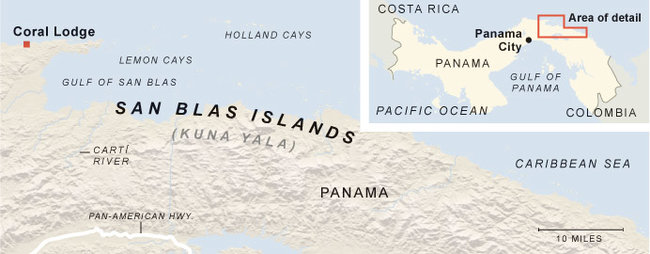
The Kuna are Indigenous people who live on the San Blas Islands—also known as the Comarca of Kuna Yala—in Panama. Mola, the Kuna word meaning “to cover” are hand-sewn, embroidered blouse fronts and backs made and worn by Kuna women. Mola blouse-front designs evolved from body painting, which, in the late nineteenth century, was discouraged by colonial law. Adapting their ancient expression of cultural identity, Kuna women began the practice of decorating their clothing with traditional designs.
The Kuna view traditional Mola that they make for themselves as their cultural wealth and intellectual property. Mola are an integral part of women’s identity. The women express their cultural autonomy in exquisite examples of geometric and abstract interpretations of ancient cosmology, representations of the latest political struggle in Panama, and trends in popular culture and fashion. Due to the popularity of the Mola among tourists, the beautiful art form has become an important source of income for Kuna women.
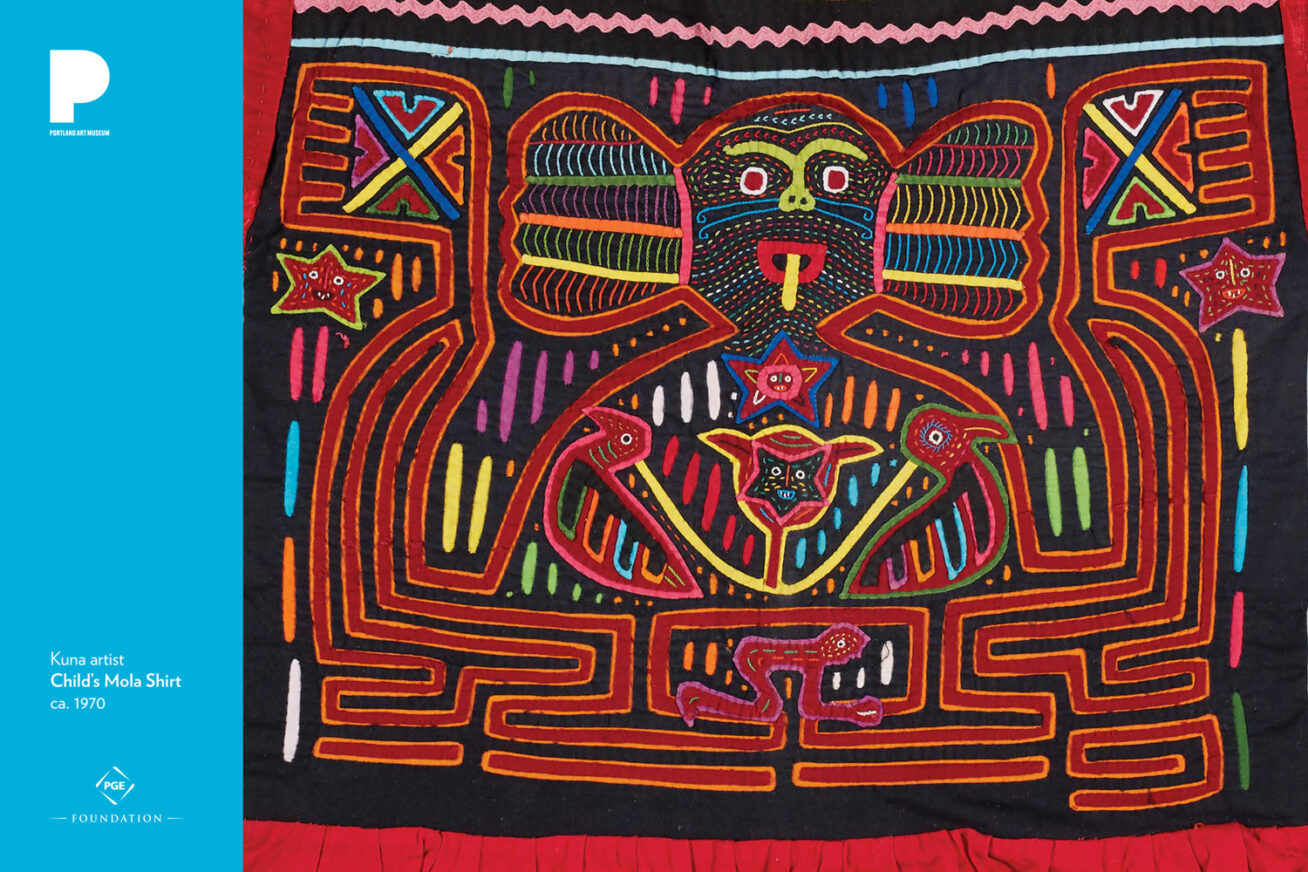
Artists use a technique called reverse appliqué to create Mola. Several layers (usually two to seven) of different-colored cloth are sewn together. The artist cuts away parts of each layer to form the design, then turns under and sews down the edges of the layers. Often, the stitches are nearly invisible because the thread is the same color as the layer being sewn. A greater number of layers is generally a sign of higher quality as well as the quality of stitching. The quality of a Mola is evident in the small size of hand stitching, evenness of cutting and hemming, complex layering of fabric, and careful spacing. Although some Mola rely on embroidery to enhance the design, those which are made using only the pure reverse-appliqué technique are considered better.
In this particular design the maker used almost entirely reverse appliqué technique with little embroidery and the stitching is very fine. We can see traditional bird and animal symbols as well as new innovations in the extended tongue of the central figure and the addition of flags and stars. Many of the designs on Mola are open to interpretation and include symbols taken from modern life and meant to appeal to the non-Kuna buyer.
Molas are so important to the identity of the Kuna that they can be credited for the independent status of the Kuna Reserve (Comarca San Blas). During the first decades of the twentieth century, the Panamanian government attempted to “westernize” the Kuna by forbidding their language, customs, and traditional dress. In 1925, the Kuna people revolted against these laws and won the right to govern their territory autonomously.
Today, Kuna women practice an additional form of Indigenous sovereignty through the establishment of cooperatives for the sale of their Mola. In this way, the Kuna women themselves and not an outside buyer, set the price for Mola and ensure fairness and noncompetition among the various communities of Kuna Mola makers.
Discussion and activities
- Study the Mola’s design and colors. Which colors and shapes were layered first and last? How many human and animal figures can you find hiding in the lines?
- How does clothing express cultural and personal identity? How does it express creativity and community values? What design would you create to wear on your own item of clothing?
- How do you think the rise in tourism and increased desire for Mola as a cultural souvenir has impacted the Kuna people and their traditional art form?
- Make your own paper Mola. (Adapted from Blick Lesson Plans: Paper Molas)
Supplies: construction paper, scissors, glue sticks, and pencils
Process:- Have students choose four colors of paper. From the first sheet, students cut out a design to use as the top piece. Students may choose a traditional Kuna design or a shape of their choice based on the natural world around them.
- Next, ask students to lay the first shape over the second color of paper and very lightly trace it a little larger, so that a thin border will be formed by the second color. Cut it out and glue the top to the second layer. Paper clips are helpful to hold the paper together when cutting the shapes.
- Repeat step 2 to create another layer of color beneath the first two. Have students glue the 3-layer shape in the center of the black sheet of construction paper.
- From the scraps of paper left, cut out and glue details for eyes, mouths, or other ornamental traditional designs. Create a border and designs around the center design.
- Have students share their design.
Sources
Spanish-language PDFs developed with the support and collaboration of